Hey everyone, it’s Jake from the pad printing machine team here. I get so many DMs and calls every week from new print shop owners, small production teams, and even startups testing their first big product run, all asking the same thing: “What do I actually check when I’m getting a new pad printing machine?” I know, it’s easy to get overwhelmed when you’re plunking down that kind of cash (yeah, new printers aren’t cheap, and used ones have their own headaches too) and you just want something that works out the box, right? After 7 years working with these things, fixing them, tweaking them, and selling them day in and day out, I’ve got the no-BS list that actually matters—no sales fluff, no jargon that makes your head spin. Pad Printing Machine
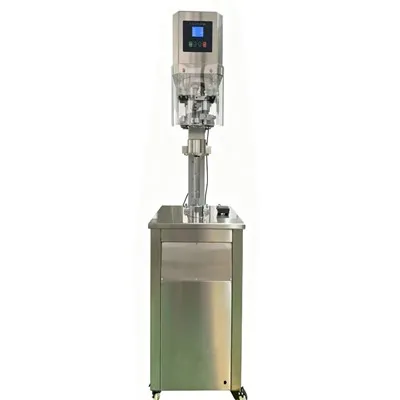
First off, let’s start with the basics that people skip because they think “it’s a new machine, so it’s fine.” Nope, not even close. Let’s talk about the pad itself—wait, not just the pad that comes with the machine, all the stuff that’s part of the pad assembly. The pad is the heart of pad printing, right? If it’s garbage, even the best machine will print garbage. First, check the material: silicone pads are the standard, but not all silicone is created equal. I’ve seen new machines with pads that are so soft they squish weird mid-print, or too hard to pick up ink from a cliché. The test here? Grab the pad, press it firmly on a flat, clean surface (like a piece of glass or a metal plate) and lift it slow. If it leaves a consistent, smooth impression without any edge curls or weird indentations, that’s a good sign. Also, check the thickness—any new pad should be at least 6mm for general use; thinner pads wear out way faster and you’ll be replacing them in 2 weeks instead of 6 months. Oh, and the shape! Make sure the pad matches the parts you’re printing. If you’re printing on curved phone cases, a round pad is great, but if you’re printing on the flat side of a syringe barrel, a rectangular or oval pad won’t sit right. I can’t tell you how many times a customer comes back upset because the pad that came with their new machine is the wrong shape for their product, and they didn’t even think to check that before running their first big batch.
Next, the cliché—super important, and another thing that gets overlooked. The cliché is the metal plate that has your design etched into it, right? A lot of cheap new machines come with clichés that are poorly etched, like shallow lines that fill up with ink mid-print, or uneven edges that cause smudges. So first, check the etch depth. You want a cliché with a consistent etch depth of around 25-30 microns—too shallow, ink doesn’t transfer; too deep, you waste a ton of ink and it takes forever to clean. How to check this? Run a small test print. Set the machine to a super light print setting, and print a test design with fine lines (like 0.5mm lines, common for logos). If the lines are crisp, no blurring, that’s good. If they’re fuzzy or have gaps in the middle, the cliché is messed up. Also, check the cliché’s surface—run your finger (gently!) over the etched area. If you feel any rough spots or unevenness, that means it’s been poorly machined, and it will cause your pad to wear out faster too. Another thing: make sure the cliché fits snugly into the holder on the machine. If it wiggles when you tap it, that’s a problem—movement will throw off your alignment and cause misprints every time.
Now, let’s get into the machine’s movements, because pad printing is all about precise movement. There are three main movements: the pad moving down to pick up ink from the cliché, moving over to the part, and moving down to print. If any of these are off, your prints are garbage. First, check the X and Y axes (that’s the side to side and back and forth movement, for anyone who doesn’t geek out over parts names like I do). Move the pad assembly manually (most new machines have a manual crank or a button to move it without running a full cycle) and see if it’s smooth. No sticking, no grinding, no weird jerky movements. If it feels gritty when you move it by hand, that means the bearings or rails are cheap, and they’ll break down fast. I had a customer last year who bought a super cheap new machine, and within 3 months the X axis seized up so bad the pad got stuck mid-print, ruining a whole batch of 1000 custom keychains. Cost them way more than the money they saved on the cheap machine. Also, check the Z axis—that’s the up and down movement. When the pad moves down to pick up ink or print, it should go in a straight line, no tilting. A tilted pad means uneven pressure, so one side of your print is too light and the other is too dark. How to test this? Do a test print on a flat piece of white paper, then hold it up to the light. If one side is faded, that’s a tilted pad, and you’ll have to adjust it every time you switch parts, which is a nightmare.
Now, the ink system—this is where a lot of new owners get frustrated, because bad ink systems lead to constant clogs and downtime. First, check the ink cup (that’s the part that holds ink on the cliché, right? It seals the ink so it doesn’t dry out while you’re printing). The ink cup should be made of hard-wearing rubber, not cheap plastic that cracks after a few weeks. Press the rim of the ink cup firmly against the cliché—if it doesn’t seal all the way around, ink will dry on the cliché between prints, leading to dirty prints. Also, check the size of the ink cup. A common mistake is buying a machine with an ink cup that’s too small for your cliché. If your cliché is 100mm wide, the ink cup should be at least 10mm larger than that all the way around, so it covers the entire design. If the cup is too small, ink will leak out the sides when the pad is picking it up. Another thing: does the machine have an ink stirring system? For many inks (like UV inks or solvent inks), you need to stir the ink constantly to keep it from separating, which keeps the color consistent. A lot of entry-level machines skip this, so you have to stir manually every 10 prints, which is a huge waste of time when you’re running a 10,000 piece order.
Next, alignment—this is non-negotiable for most people, especially if you’re printing multi-color designs. If a machine can’t align the pad, cliché, and part perfectly, it’s useless. Let’s do two quick tests here: first, test alignment on the cliché and pad. Run a single-color test print on a flat part, say a small plastic disc. Check if the print is centered perfectly on the disc, no drift left or right or up or down. Second, if you’re going to do multi-color prints (like a logo with 2 or 3 colors), test that too. Run a two-color test print, and check that the lines of the second color line up exactly with the first one, no overlapping or gaps. I’ve seen machines from no-name brands that have alignment so off you can’t even get two colors to line up, and the company refuses to fix it because it’s “just an entry-level machine.” As someone who’s on the repair side, that’s a garbage call—alignment should be accurate on any new machine, even entry-level ones, if they’re built right.
Wait, let’s not forget safety features. I know, I know, when you’re excited to use a new machine, safety is the last thing on your mind, but trust me, you need this. Pad printing machines use high pressure, sharp metal clichés, and sometimes solvent fumes, so you need basic safety stuff. First, there should be an emergency stop button—big, red, easy to reach, that cuts all power immediately. If the button is tiny or hidden under the machine, that’s a red flag. Second, guard rails or covers for the printing area. If you put your hand in while the machine is running, it should stop automatically. A lot of cheap machines skip this, and I’ve seen way too many customers get their fingers pinched or scraped because there’s no guard. Also, check if the machine has proper ventilation for fumes—if you’re using solvent-based inks, you need a vent that hooks up to a fan to pull the fumes out of the workspace. If the machine doesn’t have a pre-installed vent or a place to hook one up, you’ll have to rig something, which is a hassle and can be unsafe.
Now, let’s talk about parts availability and build quality, because a machine is only as good as the parts you can get when something breaks. A lot of new owners get stuck with a machine from a brand that only sells parts from overseas, and it takes 6 weeks to get a new bearing, leaving you with downtime that costs you money. When you’re checking a new machine, ask (or check if it’s listed) what common parts are available locally. Things like bearings, ink cups, pads, and clichés—you should be able to order these from a local print supply shop, not just the original manufacturer. Also, check the build quality of the frame. Is it made of thick metal, or thin plastic and flimsy aluminum? If you hold the machine and wiggle it, it shouldn’t move at all. A flimsy frame means every movement of the pad will cause vibration, leading to blurry prints. I once had a customer who had to bolt his new machine to the floor just to stop it from vibrating every time the pad moved—wasted 2 hours of his time, and that’s the kind of thing you shouldn’t have to do with a new machine.
Oh, and one super common thing that almost no one checks: the machine’s compatibility with your parts. Wait, you picked the machine for pad printing, right? But what’s the size of the parts you’re printing? For example, if you’re printing on a golf ball, which is 42mm in diameter, you need a machine with enough vertical and horizontal space to hold the part. If you’re printing on a larger part, like a phone case, the worktable (the part that holds your piece) needs to be big enough. Also, some machines are only set up for flat parts, and if you’re printing on curved or round parts, you need a machine that has a rotary table or a part holder that can accommodate curved surfaces. I can’t tell you how many times someone buys a standard flat-bed machine, brings it to their shop, and realizes they can’t print on their cylindrical products because the worktable doesn’t have the right attachments. That’s a waste of a whole purchase.
Wait, let’s add a quick test that anyone can do, no fancy tools needed. Run 50 consecutive test prints, all on the same material, same ink, same settings. Check every single one for consistency. Is the color the same on all 50? Are the lines crisp, no smudges? Is the placement of the print the same every time? If there’s any variation—one print is darker, one is misaligned, one is blurry after 10 prints—that means the machine’s components are not consistent, and it will give you headaches with every production run. I always tell customers: if a new machine can’t run 50 perfect test prints in a row, it’s not worth buying. Period.
Look, I get it—you’re pumped to get your new pad printing machine, and you just want to unbox it and start printing. But skipping these checks will end up costing you way more in downtime, reprinting bad batches, and repairs down the line. I’ve been in this game long enough to spot a good machine from a bad one within 5 minutes of running a test. And for what it’s worth, if you’re in the market, don’t hesitate to reach out if you have questions about any of these checks, or if you want to run through a test list with me before you pull the trigger on a new machine. I’m not here to push a sale if a machine isn’t right for your needs—if you need something smaller for home use, or something heavy-duty for 24/7 production, I can point you in the right direction, no pressure.
At the end of the day, a pad printing machine is an investment, and you want one that will work for you, not against you. Don’t cut corners on these inspection steps—trust me, you’ll thank yourself when you’re running smooth, consistent prints for years, instead of dealing with constant issues with a machine that should have been good from the start.
Packaging Equipment References
Pad Printing Technology: A Practical Guide, 3rd Edition
Industrial Printing Machinery Inspection Standards, National Association of Printing Equipment Suppliers
Pad Printing Machine Operational Safety Guidelines, Occupational Safety and Health Administration
Henan Seveneh Trading Co., Ltd.
As one of the most professional pad printing machine manufacturers and suppliers in China, we’re featured by quality products and good price. Please rest assured to buy advanced pad printing machine made in China here from our factory. We also accept customized orders.
Address: No.102 Wenhui Road, Economic Development Zone, Zhumadian City, Henan Province, China
E-mail: hnseveneh@gmail.com
WebSite: https://www.seveneh.com/
